Add/manage users
Create Users
Note: only admins have the ability to add or manage users on a site. Typically this is only one or two people per department.
- As an admin, you can add users to your site, but you cannot edit their information other than to change their permissions.
- In the dashboard, select Users > Add user
- Their username should be their umich uniquename (this cannot be changed later)
- Their email should be their umich address.
- Notify the user that they should keep an eye out for an invitation email from wordpress and that they should accept the invitation, log into wordpress and edit their user profile.
- Once the user has accepted the invitation, you will be able to change their role – if necessary – in the User dashboard.
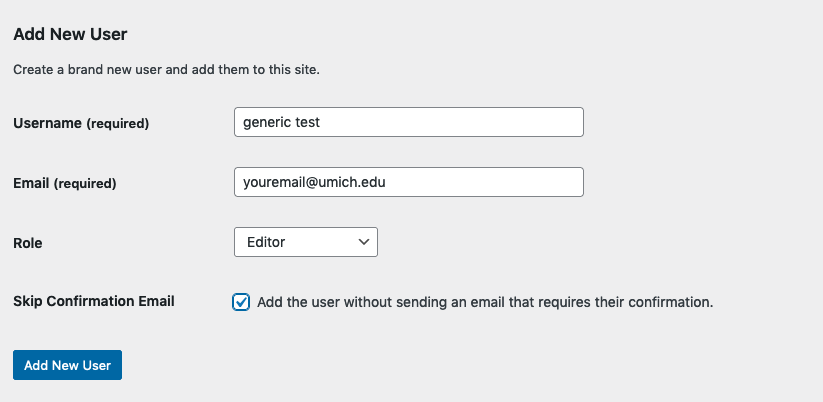
Create a generic user
You may want to create a generic user (ie. “Michigan Engineering” or “Aerospace Engineering”).
- Can be used as a fallback author for posts.
- Use the Create New User interface, but check the “Skip confirmation email” box.
- Hit the Add new user button, then follow the Edit user profile instructions
Delete users
On the Users page in the dashboard, just check the box next to the name of the person you want to delete, select Delete from the dropdown at the top of the column and hit Apply, then confirm.


Change a user’s permissions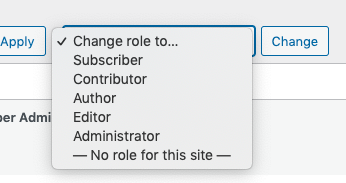
- In the dashboard, select Users
- Check the box next to the name of the person you want to change
- At the top of the table, select the “Change role to” dropdown and choose the desired role
- Click Change
Edit User Profile
WordPress calls the part that has your picture and contact info your “profile.” Access a profile by selecting “Users” in the dashboard and picking it from the list.
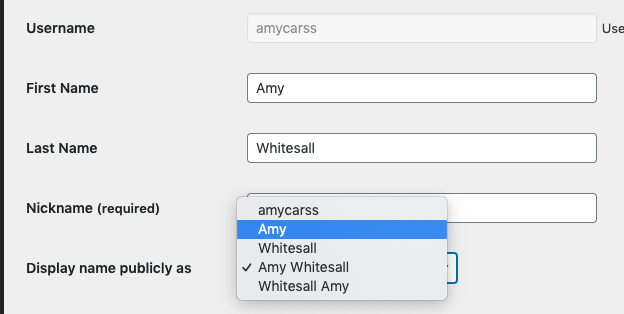
- Add first name, last name and a nickname if you want. Make sure the email listed is correct.
- Display name publicly as: Be sure to select your first and last name from the dropdown.
- All other fields in the profile are optional